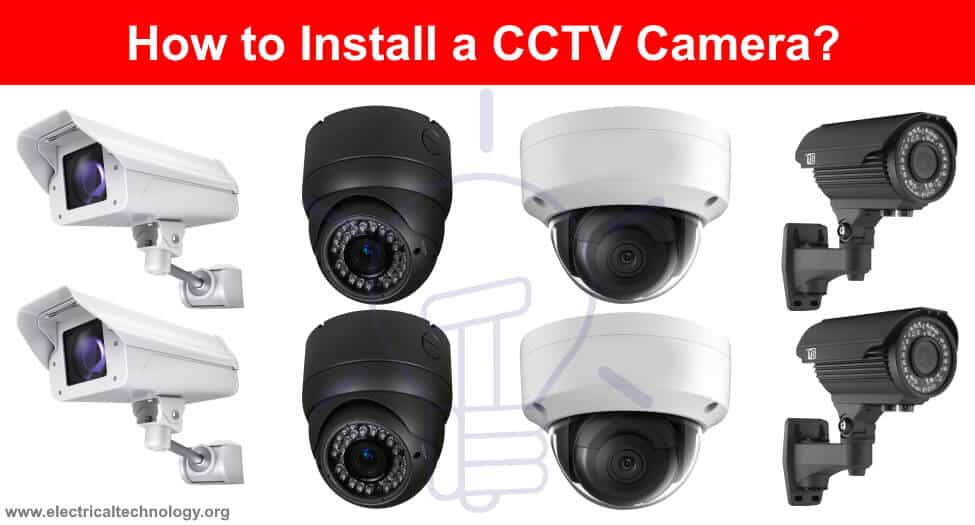
How to Install a CCTV Camera? CCTV Camera Installation with DVR
CCTV Camera Installation Wiring with DVR Security System – Step by Step
To keep the system simple (as it is) we will go step by step to show how to install a CCTV (Closed Circuit Television) security camera in home, office and other sensitive places where it needed to monitor and control the security and manage proper system for better protection.
Things You Need
- DVR / NVR
- CCTV Camera (Bullet, Dome or PTZ Cameras)
- Monitor / LCD (PC, Laptop etc)
- Power supply, adopter, power splitter and other related cables and connectors
Optional:
- PTZ Camera
- USB / Mouse
- Speaker / Microphone
- Router (To view and control the camera by smartphones through Wi-Fi)
Before we go in details, lets know that what is the difference between DVR and NVR.
What is DVR?
DVR aslo known as “Digital Video Recorder” is an electronic device which processes the video signals in the recorder and stores in the mass storage i.e. Hard driver or USB flash drive. It is slimier to the VCR and also known as PVR “Personal Video Recorder”.
The chip inside DVR is used to convert the analog video signals from camera to digital signals and stores in the hard-drive which can be seen and playback the camera recording latter.
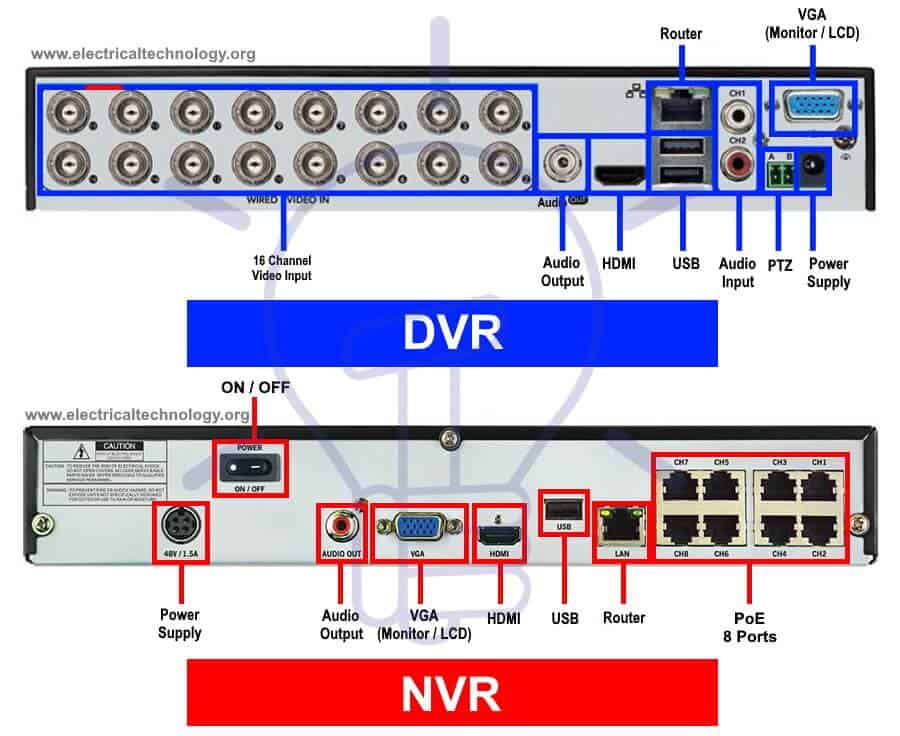
The following fig shows the different slots for connection on the rear / back side of a typical DVR.
Click image to enlarge

Difference Between DVR and NVR
DVR stands for “Digital Video Recorder” and NVR stands for “Network Video Recorder”. The main purpose of both DVR and NVR is to record the video. The main difference between the DVR and NVR is that DVR processes the video signal date at the recorder while the NVR encodes the video signal data and process in the camera where the remote viewing and data storage functions performed by NVR recorder.
Another difference between DVR and NVR is that analog cameras are needed in DVRs with coax cables while IP cameras (Internet Protocol) are required in NVRs as they process the video data signals differently through Ethernet cables. Keep in mind that NVR can be wired or wireless system whereas DVR can be wired security system.
If image quality is the consideration factor, NVR security system is better than DVR system as NVR process the data via digital System as compared to DVR analog system. In addition, the video and image quality of NVR system is better than DVR but NVR security system is little bit expensive than DVR. In recent technologies era, both systems are reliable and the suitable option depends on the user needs.
The following fig shows the different slots on the back side of a DVR and NVR.
Click image to enlarge
CCTV Camera Installation Wiring Diagram with DVR System
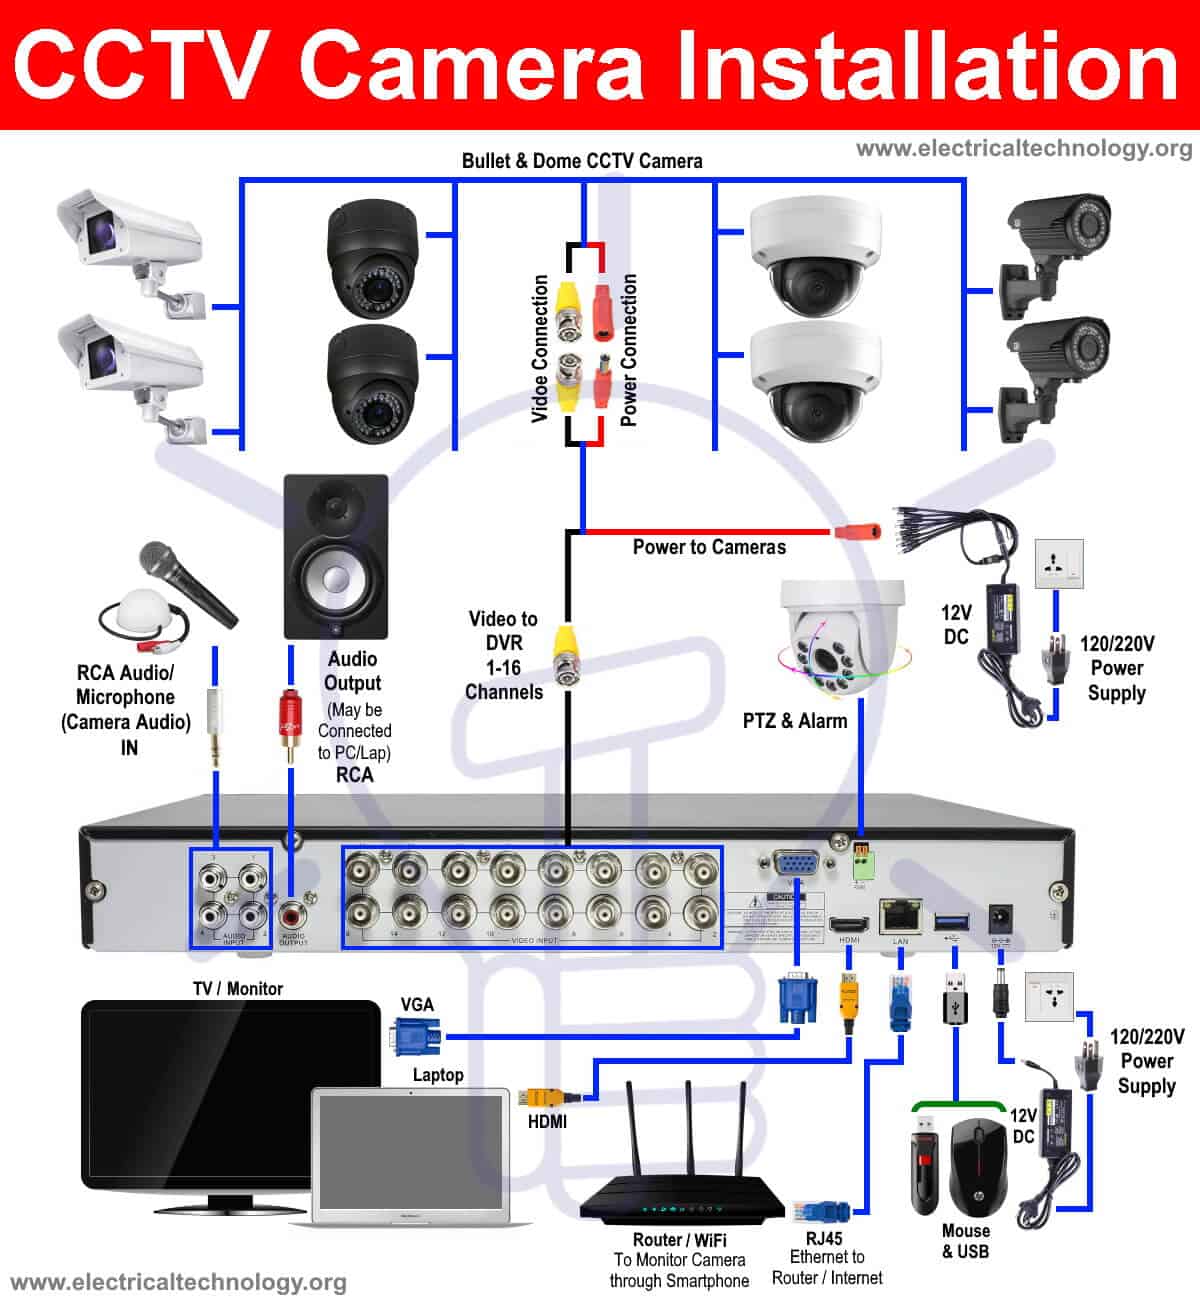
Please follow the instruction below as shown in fig below for surveillance camera installation.
- First of all, check all the cameras before installation to make sure they all are working properly.
- Connect the video and power BNC and cables connectors to the “CAMERA ONLY” labeled and power respectively. For tight connection, twist and lock the Camera BNC connectors. In fig, the yellow connector from dome cameras and bullet cameras are connected to the yellow to the DVR and red cable as power connection from camera to the 12V DC power adopter connected to the 120V or 220V AC power supply.
- Connect the video connector labeled as “DVR ONLY” to the rear / back side of DVR in the Camera input slot(s). In fig below, the yellow camera connector by extension wire labeled as “Video to DVR” is shown which can be connected to one of the 16 video input slots in the DVR. In the audio enabled cameras, the white RCA cable should be connected to the audio input slot in DVR to audio signal transmission.
- Now, connect all the red female power supply connector from the camera to the male connectors of power supply.
- Connect the all the power splitter from the camera to the 12V DC power supply adopter.
- Connect the Monitor / LCD or PC and laptops through VGA cables. For HD, use the HDMI cables and connect to the PC and DVR HDMI slot in DVR.
- Now, connect the power adopter to the 120V AC (220V in EU) by connecting the three pin plug of power adopter into three pin socket. For 24/7/365 security system, it is recommended to connect the camera and DVR to the UPS (Uninterruptible Power Supply System).
- Finally, connect the DVR power adopter to the 120V/220V AC supply as shown in fig below. You have done. Check the system if it works properly by viewing the LCD screen which shows the live camera recording.
The following fig shows a typical CCTV cameras security system with DVR.
Click image to enlarge
Optional Wiring Connection of DVR Security & CCTV Camera
The Optional wiring system of DVR Security and CCTV Cameras
- In case of external speaker, microphones and pickups or camera audio recording, the RCA connector should be connected to the audio input as shown in fig.
- For audio output, the speaker RCA connector should be connected to the Audio Output slot on DVR.
- In case of alarm and PTZ Camera (Pan, Tilt and Zoom) to monitor and detect the motion at different angles, connect the wires from the camera (RS485) to the RS485 / RS232 slot of DVR. Connect the power cables, audio and video connectors to the power, audio and video slots on the back side of DVR.
- Connect the USB or mouse through USB port as shown in fig.
- If you need to manage and control the security recording remotely through smartphones and laptops far away from the camera position, you will have to connect the Ethernet router through RJ45 cables as shown in figure below. This way, you will be able to monitor the camera recording on smartphone through Wi-Fi.
Keep in mind that for the basic CCTV camera process, you don’t need an internet connection and monitor. Monitor is needed in the initial stage while installing the camera and checking the camera live recording on the monitor screen for proper operation. You can disconnect the monitor and check the video later which has been stored in the hard disk in the DVR. If you need to control the security remotely, you will have to install the router and an active internet connection.
Note: Please see the user manual for CCTV camera installation as there are multiple types of surveillance camera available in the market. Contact the manufacturer if you are unable to follow the user manual or contact a licensed electrician as they know how to properly install and connect a CCTV camera to the DVR system.
Related Posts:
- How to Install a Solar Panel?
- How to Connect a Portable Generator to Home Supply System (Three Methods)
- How to install a Single Phase energy Meter?
- How to do Single Phase Electrical Wiring Installation in Home – NEC & IEC
- How to do Three Phase Electrical Wiring Installation in Home – NEC & IEC
- How to do Earthing & Grounding Installation?


Thank you
Very interested
In this article you will get to know about the CCTV camera installation. I enjoyed reading this article.This article is very helpful.This article mentions and acts as such a moving trigger. It is an article worth applauding for based on its content.
Thank you so much for cctv cameras installation tutorial.
I really enjoy reading this blog. The information you provided about CCTV installation was very helpful. Nice article. thanks for sharing. Hopefully, more content like this will be found in the future.