Schematic Diagram of Digital Voltmeter With LCD Display Using ICL7107 – DIY Project Kit
The ICL7107 is a high-precision analog-to-digital converter (ADC) that can be used to build a digital voltmeter. It has a 3-1/2 digit display resolution, which can measures voltages up to 200 mV, 2V, and 20V full-scale, and it operates with a single power supply voltage of +5V.
If you’re interested in a compact and mini Digital Voltmeter DIY Project Kit described in the circuit below for general maintenance, troubleshooting and testing electrical/electronic components, you can get one at the following link.
Get DIY Kit of Mini Digital Voltmeter
The following circuit can be used to read and measure DC voltage up to 2kV. You may use a voltage divider circuit with high value resistor to measure even more e.g. 300VDC. In this article, we will explore how to build a digital voltmeter using ICL7107.
Related Posts:
- Circuit Diagram of Digital Voltmeter Using 8051 Microcontroller
- Circuit Diagram of Voltmeter, Continuity & Digital LCD Circuit Tester
Components Required
To build a digital voltmeter using the ICL7107, we need the following components:
- ICL7107 IC
- Common Anode LED display (Dl1, Dl2, Dl3, Dl4 = MAN 6960)
- Breadboard
- Jumper wires
Resistors
- R1 = 180kΩ
- R2 = 22kΩ
- R3 = 12kΩ
- R4 = 1MΩ
- R5 = 470kΩ
- R6 = 560Ω
P1 = Potentiometer = Multiturn Trimmer = 20kΩ
Capacitors
- C1 = 100pF
- C2= 100nF (C6
- C3 = 47nF
- C4 = 10nF
- C5 = 220nF
- C6 & C7 = 100nF (Used in filter circuit – Not shown in the schematic)
Input Voltage:
- 0 – 20V When R3 = 0-20 V ….R3 = 1.2kΩ
- 0 – 200V When R3 = 0-20 V ….R3 = 12kΩ
- 0 – 2kV When R3 = 0-20 V ….R3 = 120kΩ
To summarize, a digital voltmeter using the ICL7107 is a simple and accurate solution for measuring voltage signals in various applications. It requires a voltage divider circuit, a 7-segment LED display, and the ICL7107 IC. The software can be programmed to implement additional features, and the output can be interfaced with other devices for further analysis and processing.
Circuit Diagram
Click image to enlarge

Overview of the Circuit:
The circuit for the digital voltmeter using ICL7107 consists of several components such as the ICL7107 IC, resistors, capacitors, voltage regulators, and a few other passive components. The voltage to be measured is fed to the IC through a voltage divider network. The IC converts the analog voltage to a digital value and displays it on a 7 segment LED display.
The voltage divider circuit is used to step down the input voltage to a safe level, which can be measured by the ICL7107. The potentiometer is used to adjust the voltage range of the voltmeter. The capacitors and resistors are used to stabilize and filter the signal.
The ICL7107 IC is a 40-pin DIP (Dual In-line Package) IC that includes an analog-to-digital converter, a multiplexer, and a 7-segment LED display driver. The analog input is connected to pin 5 of the IC, and the reference voltage is connected to pin 6. The multiplexer selects the input signal to be measured and sends it to the ADC. The 7-segment LED display driver converts the digital output of the ADC into a displayable form and drives the 7-segment LED display.
The software for the digital voltmeter is written in assembly language or in C language. The software reads the voltage signal from the ICL7107, converts it into a digital value, and displays it on the 7-segment LED display. The software can also be programmed to implement additional features, such as peak voltage measurement, voltage averaging, and voltage logging.
Working of the Circuit:
The voltage divider network is made up of two resistors in series. One of the resistors is a potentiometer that can be adjusted to calibrate the voltmeter. The output of the voltage divider network is connected to the input of the ICL7107 IC.
The voltage divider circuit consists of two resistors, R1 and R2, connected in series. The input voltage is applied across the series combination of R1 and R2, and the output voltage is taken across R2. The ratio of R2 to (R1+R2) determines the output voltage. We can adjust the output voltage range by varying the values of R1 and R2.
The ICL7107 is a 3.5 digit A/D converter IC that is designed to directly drive a 7-segment LED display. The IC has an internal voltage reference, which is used to compare the input voltage and convert it to a digital value. The digital value is then displayed on the LED display.
The IC also has a built-in multiplexer that can be used to measure multiple inputs. The multiplexer selects the input voltage that needs to be measured and then converts it to a digital value.
The programming for the microcontroller involves initializing the ICL7107 IC, reading the analog voltage, converting it to a digital value, and then sending it to the LED display. The IC continuously reads the voltage and updates the display.
PCB Layout of Digital Voltmeter
Following are the three PCB layouts of Mini Digital Voltmeter using ICL7107 with final circuit.
Click image to enlarge

Procedure:
- First, place the ICL7107 IC on the breadboard. Connect pins 19 and 20 to the negative rail and pins 1 and 40 to the positive rail.
- Connect pins 9, 8, 7, 6, and 5 to the seven segments of the display. Connect pins 21 and 22 to the decimal point and the negative rail, respectively.
- Connect pins 27, 26, and 25 to the wiper, CCW, and CW pins of the potentiometer, respectively. Connect the remaining pins of the potentiometer to the positive and negative rails.
- Connect pins 2, 3, and 4 to the positive rail. Connect pin 39 to the negative rail.
- Connect pins 10, 11, 12, and 13 to the positive rail. Connect pins 14, 15, 16, and 17 to the negative rail.
- Connect pins 18 and 23 to the negative rail. Connect pin 24 to the positive rail.
- Connect pins 28 and 29 to the negative rail. Connect pins 30 and 31 to the positive rail.
- Connect pins 32 and 33 to the negative rail. Connect pins 34 and 35 to the potentiometer.
- Connect pins 36 and 37 to the positive rail. Connect pin 38 to the negative rail.
- Place the 1N4001 diode across the positive and negative rails, with the positive side connected to the positive rail.
- Place the 1k ohm resistor between pin 18 and the negative rail. Place the 10k ohm resistor between pin 18 and pin 36. Place the 100k ohm resistor between pin 36 and the positive rail.
- Place the 1uF capacitor between pin 18 and the positive rail. Place the 0.01uF capacitor between pin 32 and the negative rail.
- Connect the positive terminal of the battery to the positive rail and the negative terminal to the negative rail.
- Adjust the potentiometer to get the desired voltage reading on the display.
Advantages
- This simple digital voltmeter circuit does not require any microcontroller.
- The digital voltmeter is more accurate and precise than analog voltmeters.
- The ICL7107 IC is low cost and readily available in the market.
- The IC can be programmed to perform other tasks besides measuring voltage.
- The LED display is easy to read and interpret.
- The circuit is simple and inexpensive to build.
- The voltmeter can be powered using batteries, making it portable and easy to use in the field.
Want to make one your OWN Mini Digital Voltmeter for General purpose Applications? Get One below with complete parts list
Get DIY Kit of Mini Digital Voltmeter
Related Posts:
- USB Propeller LED Fan Clock – Circuit Diagram & Project Code
- Circuit Diagram of Cable and Wire Tester Circuit Diagram
- How to Test a Capacitor by Digital & Analog Multimeter – 6 Methods
- How to Test a Relay? Checking SSR & Coil Relays
- How to Test a Diode using Digital & Analog Multimeter – 4 Ways.
- How to Test & Fix the Printed Circuit Board (PCB) Defects?
- How to Test a Transistor using Multimeter – NPN & PNP – 4 Ways
- How to test a battery with Test meter?
- How to find The value of Burnt Resistor ( By three handy Methods )
- How To Locate Faults In Cables? Cable Faults, Types & Causes
- Smart Home Automation System – Circuit and Source Code
- Soldering Iron Temperature Controller
- Automatic LED Emergency Light Circuit
- Automatic Night Lamp Using Arduino
- Automatic Bathroom Light Switch Circuit Diagram and Operation
-
 What is the Life Expectancy of a Circuit Breaker?
-
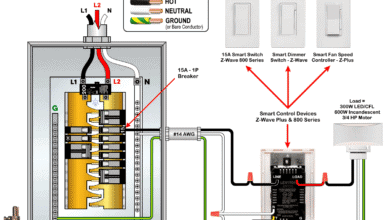 Wiring Z-Wave Smart Switch, Dimmer & Fan Speed Controller
-
 How to Wire a Smart Switch in a 120/240V Load Center
-
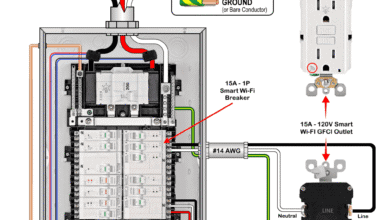 How to Wire 15A and 20A Wi-Fi Smart GFCI Outlets
-
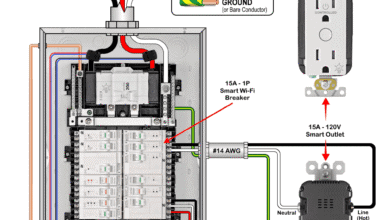 How to Wire a 15A Wi-Fi Smart Outlet in a Smart Panel
-
 How to Wire Smart AFCI/GFCI Breaker in a Smart Load Center