Car Speed Detector Circuit – Working and Source Code
Car Over-Speed Detection Circuit using Arduino
You might have heard the slogans like “Over Speeding kills”, “Drive slowly”, etc. on the roads. Over speeding is a threat to the lives of the people as it can take the life of the driver, people sitting in the vehicle or people on the roads. Therefore there must be strict rules and regulations for driving the vehicle at certain speed limits on certain roads. For this to be done traffic police must have some instrument which can help them to detect the speed of the vehicle so in case of over speeding of any vehicle they can charge the fine or take necessary actions against the driver. There is a handheld gun which makes the process tedious and the policeman has to check manually the speed of every vehicle.
- Related Project: Automatic Night Lamp Using Arduino
So we bring you a project which can help you to detect the speed of the vehicles easily and automatically. This is a very simple project and not costly. You just need on a microcontroller like Arduino Uno and two IR sensors to detect the speed of the vehicles. This project will help you to detect the speed of a moving car easily without any human intervention by simply placing it somewhere on the road. This project is just a prototype and can be implemented on a large scale.
Components Required for Car Speed Detection Project
- Arduino UNO
- IR Sensors
- Jumper Wires
Arduino UNO
Arduino is an open-source platform which is used to develop an electronics project. It can be easily programmed, erased and reprogrammed at any instant of the time. There are many Arduino boards available in the market like Arduino UNO, Arduino Nano, Arduino Mega, Arduino lilypad, etc with having different specification according to their use. In this project, we are going to use Arduino UNO to control home appliances automatically. It has ATmega328 microcontroller IC on it which runs on 16MHz clock speed. It is a powerful which can work on USART, I2C and SPI communication protocols.
This board is usually programmed using software Arduino IDE using a micro USB cable. ATmega328 comes with preprogrammed onboard boot loader which makes it easier to upload the code without the help on external hardware. It has vast application in making electronics projects or products. The C and C++ language is used to program the board which is very easy to learn and use. Arduino IDE makes it much easier to program. It separates the code in two parts i.e. void setup () and void loop (). The function void setup() runs only one time and used for mainly initiating some process whereas void loop() consists the part of the code which should be executed continuously.
This model consists of 6 analog input pins and 14 digital GPIO pins which can be used as input and output. Out of this Six pins provides PWM output and analog using pinMode(), digitalWrite(), digitalRead() and analogRead() functions. Six analog input channels are from pins A0 to A5 and provide 10-bit resolution.
The board can be powered either from using a USB cable which operates at 5 volts or by DC jack which operates between 7 to 20 volts. There is an onboard voltage regulator to generate 3.3 volts for operating low powered devices. Since the ATmega328 work on USART, SPI and I2C communication protocol, has 0 (Rx) and 1(Tx) pins for USART communication, SDA (A4) and SCL (A5) pin for I2C and SS (10), MOSI (11), MISO (12) and SCK (13) pins for SPI communication protocol. These specifications make Arduino Uno board perfect for Home Automation project.
- Related Project: Smart Home Automation System – Circuit and Source Code
Interrupts in Arduino UNO
Interrupts are the processes in which any input/output or any instruction can suspend the normal execution of the process or task and get itself executed first by making it as the highest priority. The interrupted task is performed first and after its completion, other tasks are executed normally.
Basically, interrupts helps us to make our system more responsive to time-sensitive tasks. A processor doing a normal execution can be interrupted by some sensor to execute a particular process that is present in ISR (Interrupt Service Routine) and after executing the ISR processor can again resume the normal execution. For instance in this project whenever the IR sensor will detect any car then it will trigger an interrupt to the Arduino UNO will immediately stop all its process and will signal detection of the object or car by the IR sensor.
Now there are two types of interrupts: Hardware interrupt and Software interrupts. Whenever an external interrupt pin changes its state from low to high or high to low then it is hardware interrupt. Software interrupts are occurred due to some instructions from the software. Arduino UNO has two external interrupt pins at 2 and 3 which are interpreted by hardware and are very fast.
- Related Project: Cable and Wire Tester Circuit Diagram
Interrupt Service Routine (ISR)
An Interrupt handler also known as Interrupt Service Routine is a kind of event consist of small sets of instructions in it. When an external interrupt occurs, the processor first executes the code that is present in ISR and returns back to the state where it left the normal execution.
Syntax for Interrupt Service Routine is:
attachInterrupt(digitalPinToInterrupt(pin), ISR, mode);
Here digitalPinToInterrupt(pin) specifies the input pin that is used for external interrupt here. ISR function is called when an external interrupt is done. Modes are of three types: FALLING, RISING and CHANGE which differs in the type of transition. Falling is triggered when pin transits from high to low or low to high. Rising is triggered when the pin transits from low to high and Change triggers when the pin transits from low to high or low to high.
In this project, two external interrupt pins are used for two IR sensors to detect the speed of the car at the pin 2 and 3 of the Arduino UNO.
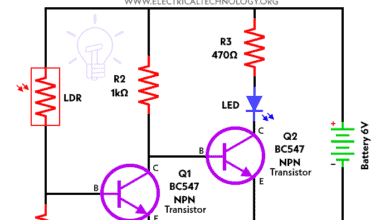
- Related Project: Electronic Eye Circuit – Using LDR and IC 4049 For Security Control
IR Sensor
IR sensor is an electronic device which measures infrared radiations and helps to detect obstacles and the motion in our surrounding. It mainly consists of a transmitter led and a receiver photodiode and detects infrared radiations having a wavelength from 700nm to 1mm emitted by the objects. When a specific positive voltage is applied across the transmitter led it transmits the IR rays. If these rays fall on some object then that object reflects back the IR rays which are received by the receiver diode. The receiver diode generates a voltage across its terminals which depend on the intensity of light reflected by the object. Generally, IR receiver led is darker whereas transmitter is transparent in color.
IR sensor module consists of an IR led, a photodiode, a potentiometer, an IC Operational amplifier, and an LED. IR led emits the infrared light whereas photodiode detects the infrared light. A potentiometer is used to change the range of detection and calibrate the output of the sensor according to the requirement. An operational amplifier IC is used as a voltage comparator. When infrared light is emitted by the IR led, it falls on the object and reflects back to the photodiode which further drops its resistance significantly. One output of the op-amp is set by the potentiometer as threshold voltage and the other is set by the photodiode.
Hence, the voltage drop across the series resistor is HIGH when the incident radiation is moreover the photodiode. Therefore, the operational amplifier IC compares the pre-defined threshold voltage and the voltage across the series resistor. And, according to that comparison, if the voltage across the series resistor is greater than the threshold voltage, the output of the operational amplifier IC will be HIGH. Thus, the LED connected at the output of the op-amp starts glowing. We can adjust the threshold voltage by adjusting the potentiometer on the IR sensor module.
This IR sensor has many applications and can be used in various projects like proximity sensors, line follower robots, IR item counter, burglar alarm, IR music transmitter, and receiver.
Mainly, these Infrared sensors are used in the radiation thermometers for the measuring of temperature depends upon the material of the object.
IR Sensor module comes with 3 pins, two of them are VCC and Ground and one is the digital output pins which activate when it detects some obstacle. This pin goes to GPIO pin to either GPIO pin or interrupts pin on the microcontroller. In this project, we will be using two IR sensors to detect the speed of the car. These are to be connected to the two different interrupt pins on the Arduino UNO which further will be used to detect the time of the distance covered between two IR sensors.
Car Speed Detector Circuit Diagram

Working of Car Speed Detector Circuit
Make the connection as shown in the circuit diagram. Place the two IR sensors at some distance apart. In this project, we have kept a distance of 30 cm between them. IR sensors are powered from the Arduino and the data pins of both the sensors are connected to pin2 and pin 3 of the Arduino. Now copy the code given in the end of the project and paste in your Arduino IDE. Upload the code on the Arduino UNO.
This project works on simple physics law of calculating the speed as distance/time.
Speed = Distance/Time
IR sensor is the main part of this project as it is used to detect when a car is passed through it. When a car passes the 1st IR sensor, it detects and sends an interrupt signal to the microcontroller. Now we calculate the time till the car reaches the IR sensor 2. The difference of both the time is the travel distance from one sensor to the other. We get the time in which car travels a distance of 30 centimeters so we can calculate the speed of the car. Since it is just a prototype and we are using toy cars, therefore, we are taking distance as 30 centimeters. Now we can set any parameter for over speeding of the car. For instance, if the speed of the car is more than 60 m/sec then it displays over speeding on the serial monitor.
- Related Project: Automatic Street Light Control System using LDR
Source Code for Car Speed Detection using Arduino
int ir1 = 2;
int ir2 = 3;

int T1;
int T2;
int T;
int flag = 0;

float distance = 0.27;
float Speed;

void setup() {
  attachInterrupt(digitalPinToInterrupt(ir1),ISR1,RISING);
  attachInterrupt(digitalPinToInterrupt(ir2),ISR2,FALLING);
  Serial.println("Car Over Speed Measurement");
}

void ISR1()
{
  T1 = millis();
  if (flag == 0)
    {
      flag = 1;
    }
  else
    {
      flag = 0;
    }
}

void ISR2()
{
  T2 = millis();
  if (flag == 0)
    {
      flag = 1;
    }
  else
    {
      flag = 0;
    }
}


void loop()
{

  if (flag == 0){
  if(T1 > T2)
  {
    T = T1 - T2;
    Speed = (distance*1000)/T;
  }
  else if (T2 > T1)
  {
    T = T2 - T1;
    Speed = (distance*1000)/T;
  }
  else
  {
    Speed = 0;
  }
  }

  if (Speed == 0)
  {
    Serial.println("No car detected");
  }
  else
  {
    Serial.print(Speed);
    Serial.println(" m/sec");
    if(Speed > 60)
    {
      Serial.println("Over Speeding car detected");
    }
    delay(1000);
    T1 = 0;
    T2 = 0;
  }
}
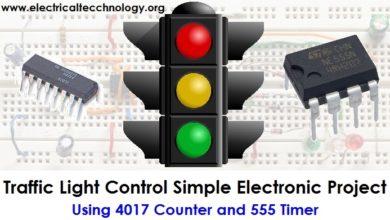
- Related Project: Traffic Light Control Electronic Project using IC 4017 & 555 Timer
Code Explanation
The ir1 and ir2 are the external interrupt pins used on the Arduino Uno. T, T1, and T2 are the variables to calculate the time. Since for this project we are placing the two IR sensors at a distance of 30 centimeters, therefore, we have taken distance as 30 to calculate speed.
int ir1 = 2;
int ir2 = 3;
int T1;
int T2;
int T;
int flag = 0;
float distance = 30;
float Speed;
The syntax for calling ISR both for sensor 1 and sensor 2.
attachInterrupt(digitalPinToInterrupt(ir1),ISR1,RISING);
attachInterrupt(digitalPinToInterrupt(ir2),ISR2,FALLING);
This function is used to call the Interrupt Service Routine for IR sensor 1 on detection of an object. Same this is done for IR sensor 2 in function ISR2.
void ISR1()
{
T1 = millis();
if (flag == 0)
{
flag = 1;
}
else
{
flag = 0;
}
}
T1 is the time of for detecting car by IR sensor 1 and T2 is the time for detecting IR sensor 2. The difference in both the time is the time taken to travel the distance between two IR sensors.
if(T1 > T2)
{
T = T1 – T2;
Speed = (distance)/T;
}
else if (T2 > T1)
{
T = T2 – T1;
Speed = (distance)/T;
}
else
{
Speed = 0;
}
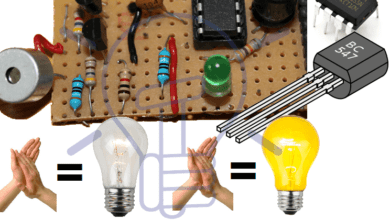
- Related Project: Clap Switch Circuit Electronic Project Using 555 Timer
The line of codes given below prints the speed of the car and prints the message in case of over speeding on the serial monitor.
if (Speed == 0)
{
Serial.println(“No car detected”);
}
else
{
Serial.print(Speed);
Serial.println(” m/sec”);
if(Speed > 60)
{
Serial.println(“Over Speeding car detected”);
}
delay(1000);
T1 = 0;
T2 = 0;
}
This was the prototype of the calculating over speeding of the car. This idea can be implemented on roads by using real cars and increasing the distance between the two IR sensors. This project can be used to capture the speed of the vehicles without any human involvement. Also, it can be used in traffic logger, traffic counter and many more traffic-related applications.
Related Projects:


I need a Arduino Project…. Thank you
I need some definition.. 1.What is Industrial automation 2. Current status in Industrial Automation. 3. Types of Automation. 4.How to impliment the Automation.5. Advantages and disadvantages…
Thank you…….
You you check this post: What is Industrial Automation | Types of Industrial Automation
Is this project display results in LCD 16*2 display??
The output is not displayed on serial monitor so what should I do??
Please can you send the wiring diagram for this project. So I can wire it properly because it doesn’t give any output. My email zfred41@yahoo.com
Good day. I like your work on this side and I am a regular visitor. I am doing my final year project on the arduino car speed detector. Please I will like you to assist me. Please I will need you to send me the wiring diagram of the circuit and the program code to my website. Thank you.
You could’ve just inverted flag without conditional statements. Simpler and more efficient.
flag = !flag.
Furthermore, if you make T1 and T2 unsigned, you don’t have to check for the order of subtraction. Distance between sensor 1 and sensor 2 will always be correct, even if T2 has rolled over since T1 was triggered. That is, assuming T1 is always triggered before T2 is.